Microsoft Entra ID
Audience: Application Admins
Content Summary: Immuta can integrate with Microsoft Entra ID as an IAM over SAML 2.0. This page outlines how to register Immuta as an Azure Enterprise Application with Single Sign-On over SAML 2.0.
Create an Enterprise Application
Microsoft Azure Subscription
Microsoft Azure requires a Premium subscription to create a non-gallery application, which is essential for this integration.
-
In the Microsoft Azure portal, browse to Enterprise Applications.
-
Click the New Application button and then select Create your own application.
-
Name the application with the name of your choice, select Integrate any other application you don't find in the gallery (Non-gallery), and click Create.
-
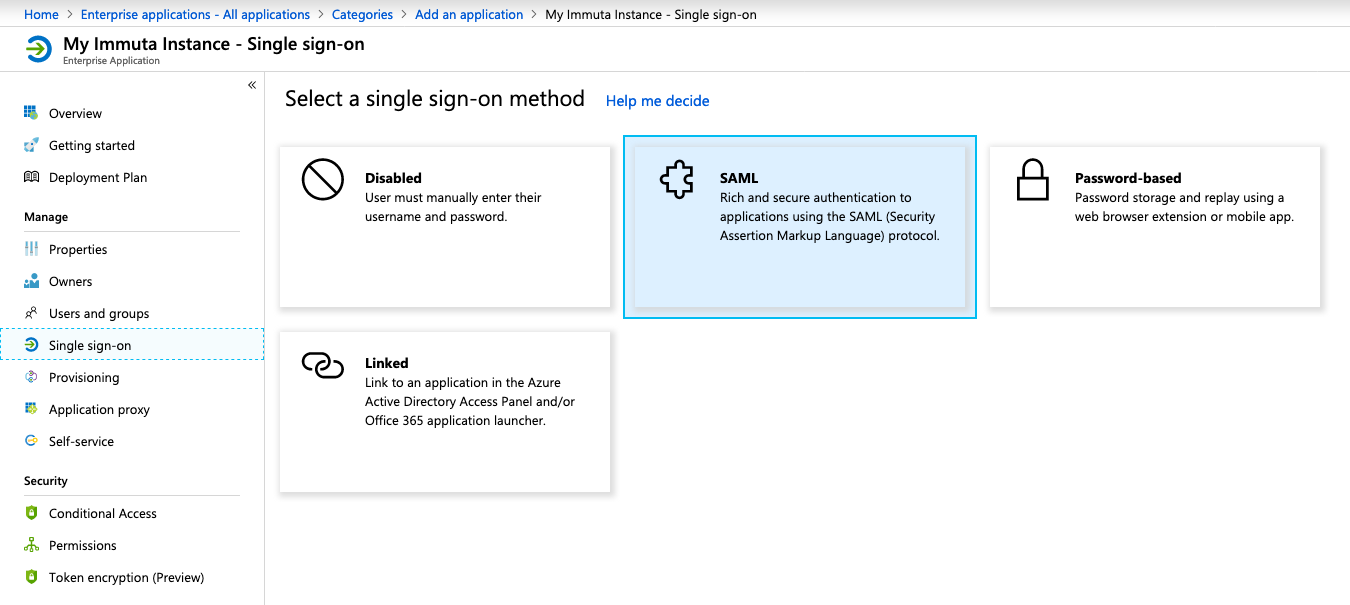
On the left menu, choose the Single sign-on menu item and then pick the SAML tile:
-
In the first section (Basic SAML Configuration), click the Edit icon and fill in Identifier (Entity ID) field with the full URI of your Immuta app (e.g.,
https://immuta.my-comany.com). -
In the second section (User Attributes & Claims), specify the unique user identifier you want to use in Immuta. Common choices are the
mailclaim or theuserprincipalnameclaim. You can also specify the user claims you want Azure to expose to Immuta. You will use the names of those claims to map them to Immuta user attributes when you create an IAM. -
In the third section (SAML Signing Certificate), click the Download link next to Certificate (Base64) and save the file on your hard drive:
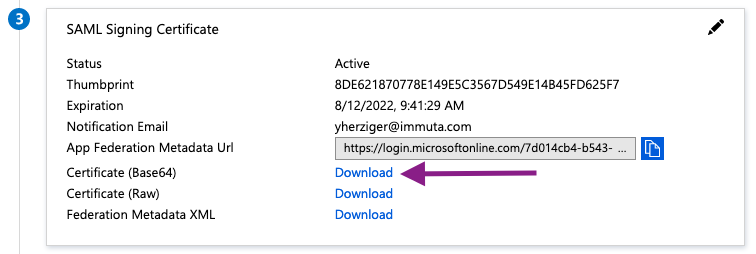
-
In the fourth section, copy the Login URL and save it for when you will create the IAM through the Immuta UI.
Now that you have an enterprise application in place, continue to create and configure an IAM in Immuta. You will need a few details from the Immuta UI to complete the configuration of the enterprise application.
Create an IAM
-
In Immuta, browse to App Settings, go to the Identity Managers section, and click Add IAM
-
Assign a name to the new IAM. Immuta will automatically derive the ID of the IAM from the name you pick.
-
Select SAML in the Identity Provider Type drop-down.
-
Start configuring the new IAM:
- Default Permissions: The default permission that should be assigned to a Microsoft Entra ID user in Immuta.
- Issuer: This field needs to have the same value as the Identifier (Entity ID) of the enterprise
application (e.g.,
https://immuta.my-comany.com). - Entry Point: Paste the Login URL that you obtained in the previous section.
- User ID Attribute: This field is the attribute that will contain the username of the user logging in.
- Signing Certificate: Upload the certificate file you have previously downloaded and converted into a PEM encoded certificate.
- Decryption Private Key: This field is the optional key for decrypting attribute assertions.
- Enable SCIM support for SAML: Opt to enable SCIM support.
- Profile Schema: Map user claims you have previously exposed in the application to Immuta user attributes.
-
Enable any optional settings you want:
- Link SQL
- Allow Identity Provider Initiated Single Sign On: After checking this option,
set
disableRequestedAuthnContexttotrueunder Additional Config Parameters. - Sync groups from SAML to Immuta
- Sync attributes from SAML to Immuta
- External Groups and Attributes Endpoint
Before you can test the integration and save the new IAM, you will need to go back to the Microsoft Azure Portal and fill in the Reply URL.
-
In the Single sign-on page of your enterprise application, edit the first section with the title Basic SAML Configuration.
-
Fill in the Reply URL (Assertion Consumer Service URL) field with a value that adheres to the following format:
${IMMUTA_URL}/bim/iam/${IAM_ID}/user/authenticate/callback. For example, if the URL to your Immuta tenant ishttps://immuta.my-comany.comand the assigned IAM ID isMicrosoftEntraID, the value of the Reply URL field should behttps://immuta.my-comany.com/bim/iam/MicrosoftEntraID/user/authenticate/callback. To save the changes, click Save: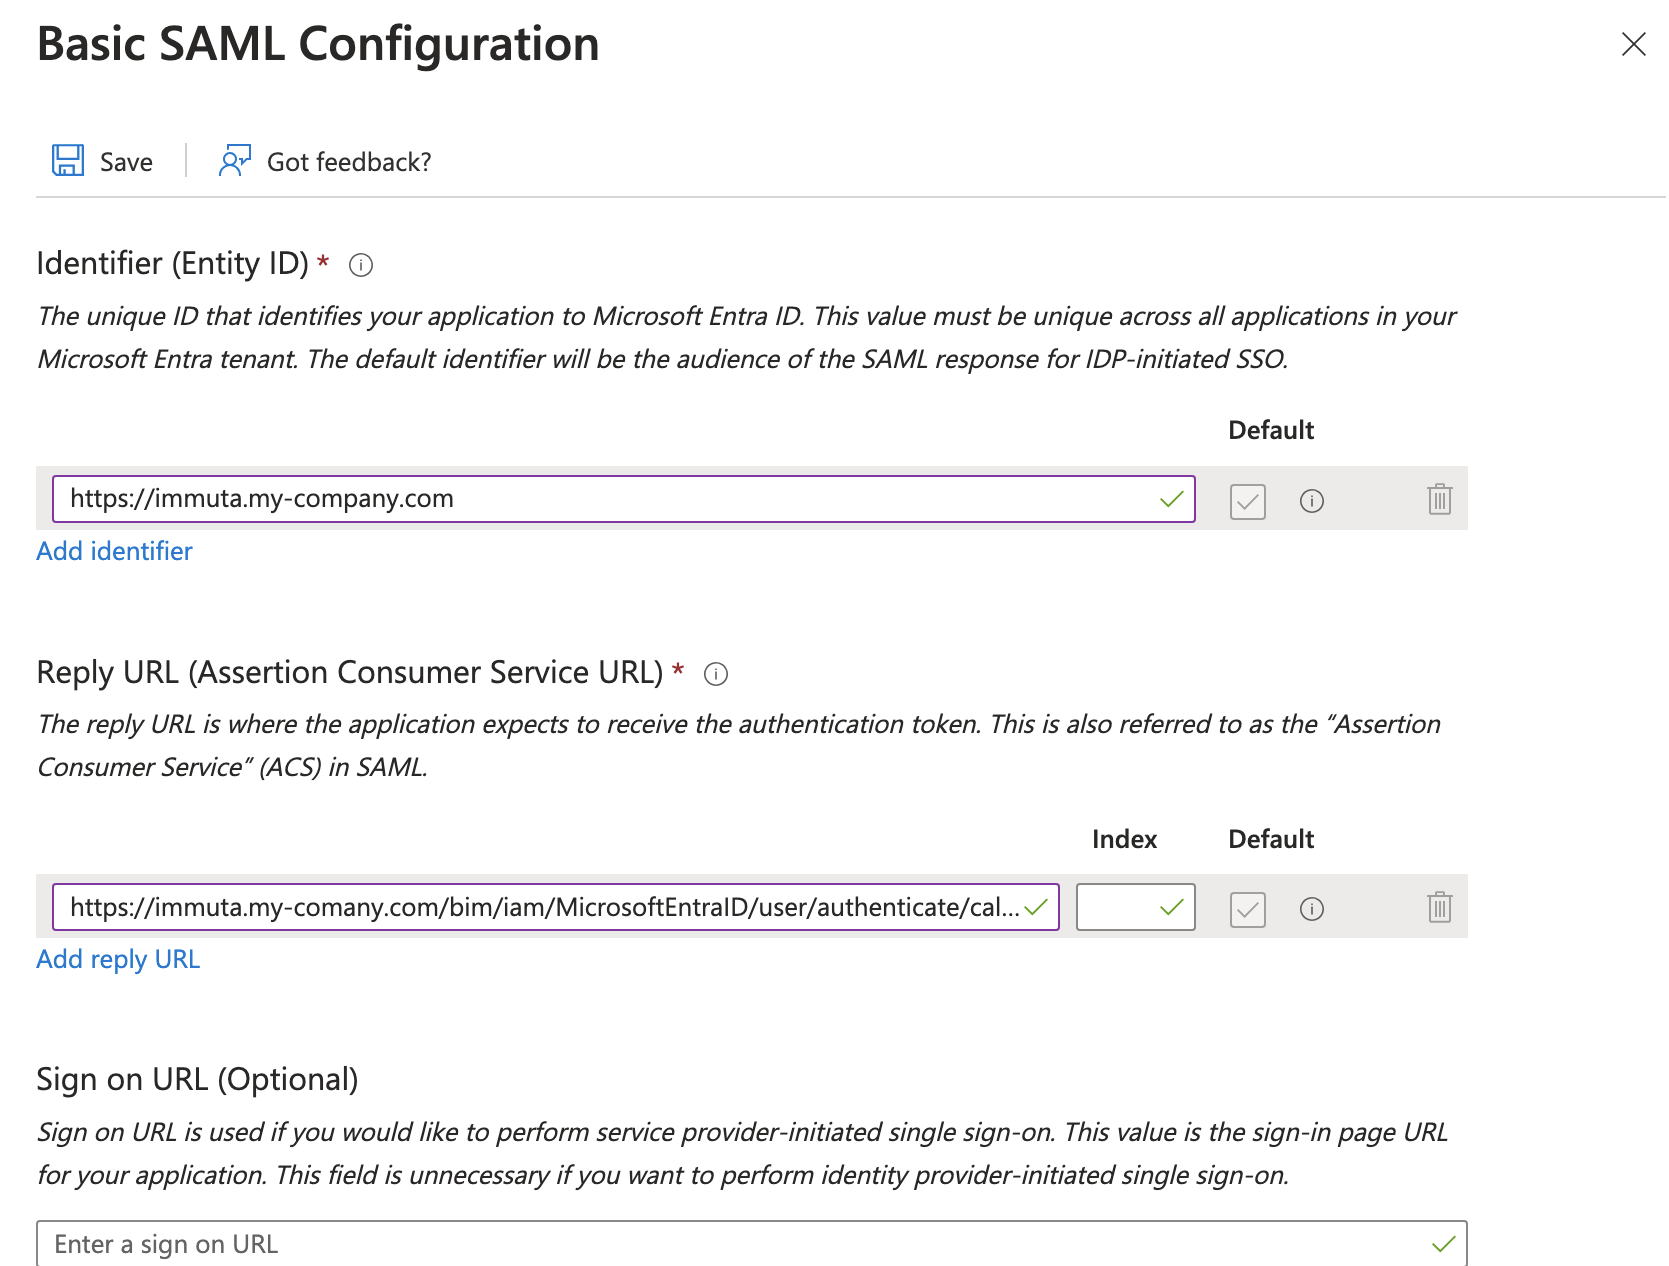
Finding the assigned IAM ID
You can find the IAM ID that Immuta has assigned to the IAM in the form:

-
You should now be able to test the IAM and save it. After clicking Test Connection and letting Immuta hit the enterprise application URL, you will need to verify that the authentication flow works before you can save and create the IAM. To do so, click Test User Login and follow the instructions.
-
Save the changes in Immuta.